Sunday 26 April 2015

See Another World

Hello,

The current theme over on the Paperartsy blog is 'niches' - this topic has been floating around in my head for the past two weeks but I couldn't find anything niche-like to create! Yesterday I was in The Works and spotted some little craft matchboxes so got them so I could join in :0)

So here is my little matchbox niche:

Used grunge paste and the Clare Lloyd zigzag stamp (ECL04) to create the outer texture - painted using Jade, Buff and Olive Bronze Treasure Gold.

The inner part is painted using Prawn and Carribean Sea:

The main image is from Lynne Perella set LPC030. I masked part of the image off to create the border around the inner box.

The same Clare Lloyd zigzag stamp was used inside the box also and highlighted using a white sharpie.

I added a brad as a handle and then to finish some Tim Holtz chit chat stickers with some doodled borders.

All done!

Linking up to Paperartsy Topic 7 - Niches HERE.

Thanks for looking,

Claire xx


Thursday 23 April 2015

Art it Friday

Hello,

I saw on Kim Dellow's blog that she is hosting 'Art it Friday' and she has been bitten by the portrait bug! So I thought I would give one a go - not what I usually do but it is really something I enjoy and would love to practise more!

So I created a page in my small Dylusions journal, started with a piece of washi along the spine and a bit of grunge paste stencilled through a Paperartsy stencil. Then set about colouring the background using the new limited edition JOFY paints, which are new to me, adding the colours with a babywipe. I used all four of the colours on here as I wanted to try them all out :)

Drew my girl in pencil and coloured her using neo colour crayons - I debated leaving her in black and white but now she's coloured in I'm glad I didn't.

So here is my page:

A little bit of stamping with a couple of Prima Finnabair stamps and a smidge of harlequin stencilling in the background. Then added the quote and a couple of little doodles using a black micron pen.

Thanks for looking,

Claire x


Monday 20 April 2015

Trading Post ATC

Hello,

Today I'm sharing an ATC I made a few days ago but completely forgot to blog it.

I created it to join in with a brand new challenge format over at the Artist Trading Post blog which you can find HERE. The first challenge is to create an ATC inspired by the trading post and there are some photos for inspiration too.

So here is my ATC:

I started with an ATC sized piece of card and then used the wrinkle free distress technique to colour it using Vintage Photo and Walnut Stain inks. Then I added some Shabby Shutters around the edges to give it a more weathered look.

I used an old Tim Holtz stamp set called lost and found, stamping the script in the background with second generation Walnut stain ink and then the main image using black archival.

I then bleached out the children, numbers and the word memories using water and kitchen paper.

For the texture around the edges I mixed some Grunge Paste with a little bit of Cinnamon primary pigment and spread around the edges creating some texture in it with my palette knife as it dried.

Once totally dry I went it with a brush and some Olive Tresure Gold to give all that texture some highlighting.

Thanks for looking,

Claire x


Sunday 12 April 2015

Golden Petals

Hi, back again to share a last minute tag for the Paperartsy grunge paste challenge:

Started with a size 8 manilla tag and spread grunge paste through the Paperartsy Lin Brown stencil PS005 along one side.

I sprinkled gold embossing powder onto the grunge paste while it was still wet and then left overnight to dry naturally.

The next day I heated the embossing powder - I did it this way as I didn't want my grunge paste to bubble and distort - I wanted the flowers to keep their shape:

Next I sprayed my tag and craft sheet with water then added a few drops of Lavender and Marlin Fresco paints and dragged the tag through, dried it throughly, then repated this process a few times until I was happy.

Then I added the stamping in black archival from Lin Brown plate ELB01, heat set and added white highlights with my posca pen.


I edged the tag with black archival ink and then added the black ribbon to the top.


I've never embossed grunge paste in this way and have always heated it immediately so am happy that it turned out so crisp as I wasn't sure if the embossing powder might just brush off once the grunge paste dried.


Please visit the Paperartsy blog HERE to see all the other wonderful creations people have been making over the past three weeks!

Thanks,

Claire x


Boxy Butterfly

Hello,

So in my local town a new shop called The Range has just opened which sells all kinds of homeware items including loads of frames - I saw some deep box frames which come in a variety of sizes and ended up buying three of the white 12x12 ones as I want to create something to hang on my staircase walls.

After being so happy with my recent grunge paste on hessian trial here I decided to try to create something like that but on a larger scale:

I started with a square of hessian and smoothed on a coat of grunge paste, once dry I added a second coat and allowed to dry throughly before sanding gently.

Then I decided to use my much unloved Gelatos - I used five different colours in the pink, orange, yellow type sticks. Adding water and drying, going in with more colour again until I was happy:


Then I totally stopped taking photos and before I knew it I was all done - oops!

Anyway I stamped the butterfly collage stamp, which is a Prima/Finn stamp, using black archival in the centre of the panel then extended it some by adding more splatters with a black pen and also additional stamping using her don't forget to fly stamp plate. I then cut, pulled and torn the edges of the hessian to attempt to make it look naturally frayed:

I torn a mount for my hessian and painted it with Vintage Lace Fresco paint but this just wasn't the right colour when I layered them so I added a light layer of Snowflake with my brayer - much better. I then distressed the edges of both the hessain and the torn mount using Walnut Stain distress ink.

I cut a piece of scrapbook paper to fit the frame, layered the brayer paper on top followed by the hessian panel - I stuck them all using gel medium as I don't want them falling off whilst hung up on the wall! I had planned to use more embellishments and had some lasercut wooden butterflies to add but when it came to it I preferred it without them.

Then it was all done:

I have the other two frames left which I want to create similar pieces for in different colour schemes (I'm thinking maybe a blue/green and a orange/yellow/brown maybe?) and then I'm going to arrange them on my stair wall as a kind of triptych piece hopefully!

I'd like to link my make to the current Paperartsy challenge which is Altered Grunge Paste, to find out more and see the DT inspiration click HERE.

I would also like to link my project to the current Artful Times challenge which is Tattered and Torn - click HERE to find out more.

Thanks for looking,

Claire xx


Saturday 4 April 2015

Grunge Paste Fun

Hi Everyone,

The current challenge over on the Paperartsy blog is to use Grunge Paste or other texture paste.

You can find out all the info and see the DT inspiration HERE

The May edition of Craft Stamper magazine arrived the other day and in it Elizabeth Borer has a masterclass on stamping onto fabric - including stamping on hessian. I wanted to give this a try so here is my finished piece:

To start with I took a wide piece of hessian ribbon, it was really thick and sturdy.

I smoothed the Grunge Paste on with a palette knife as Elizabeth did in her project, once dry I added a second layer just to make sure I had a nice surface.

Next I added stamping with black archival and the Clare Lloyd Paperartsy plate ECL04 and heat set.

I coloured my girl using Spectrum Noir pencils then coloured the background around her using a babywipe and Chutney, Chartreuse and Pumpkin Soup Fresco paints. Then frayed the edges of the hessian for a nice rustic look:

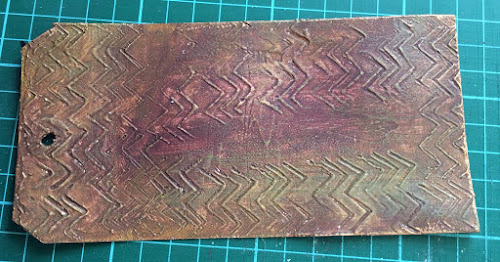
I then created a tag to mount her on by spreading a thick layer of Grunge Paste onto a size 8 tag then stamped into it using the zigzag stamp from the same Clare Lloyd plate.

I painted the tag using Chutney and Seaweed then lightly dry brushed some Chartreuse over the top before rubbing over a little Renaissance Treasure Gold to really highlight all that texture:

I stuck my hessian girl onto the tag using gel medium as she is quite thick and heavy (poor girl!)

And there she is all done:

A couple of close ups:


Loved making this - the textures are great and I love the effect of using the pencils over the grunge pastey hessian!

Thanks for looking,

Claire x