Monday 30 March 2015

Bonny Bonita!

Hello,

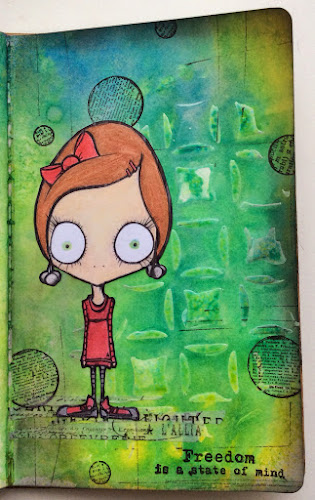
Today I'm sharing a quick journal page I created to practise my colouring using my spectrum noir pencils.

I created it in my small Dylusions journal:

Started with Prima 3D gloss gel by Finn through a stencil and once dry used various Dylusions sprays - I didn't really pay attention to what the colours were!

Stamping in the background is done with black archival and I used Finn's new cling stamps from her don't forget to fly plate.

I added some black lines with Fresco Little Black Dress paint and a card, added some torn Tim Holtz tape for her to stand on and inked the edges with Black Soot distress ink.

Finally I added Bonita to the page - she is a digi stamp from The Octopode Factory - I coloured her using Spectrum Noir pencils, cut her out and edged her with black pen to get rid of those white edges.

I'd like to enter my page in the first challenge on the newly branded blog - mixed media world. The first challenge is anything goes. Click here to check out their new blog and to see what the DT have been upto!

Thanks for looking,

Claire x
 

Sunday 29 March 2015

Spring has sprung

Hi Everyone,

So it is officially springtime here in the UK now - the clocks changed last night!

So today I spent the afternoon in my craftroom - here is a card I made for my husband for our 3rd wedding anniversary which is on Tuesday:

The starting point was a piece of 6x6 mountboard - I used Paperartsy Grunge Paste through their PS005 stencil by Lin Brown:

I used a Fresco paint mixture of Caribbean Sea and Banana for the green background, then added bits of the same two colours as they were plus a touch of Bougainvillea also over the top of the grunge paste:

I sanded the whole piece back, it is now lovely and smooth:

The two hares from Crafty Individuals plate CI-372 were stamped onto some old book paper and then again for their hats and painted with Fresco Old Gold, all cut out and layered up.

The border was added using gold and white embossing powder over some glue stick swiped along the edges:

The black stamping straight onto the background is our wedding anniversary date which is from Paperartsy stamp plate HPXT06.

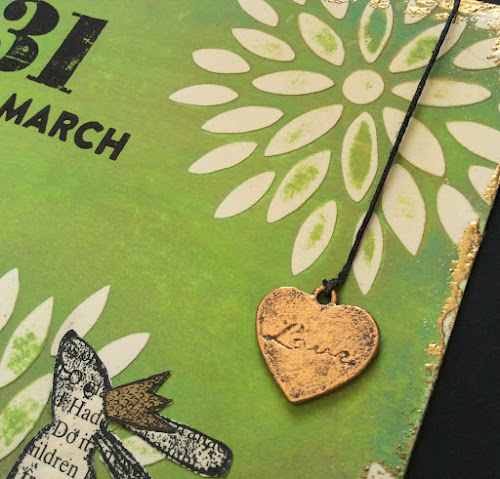
I wanted to add a heart but didn't want it to be too girly so I found this one in my stash - it was very shiny silver. I gave it a couple of coats of Slate Fresco paint and then added Renaissance Treasure Gold wax and buffed it, then added it using some black waxed thread. I like how it has a rustic feel to it:

I then attached the mountboard onto a 7x7 black cardblank - luckily I don't need to post it as it is quite thick and heavy :)

I would like to enter my card into the following challenges:

Paperartsy: Grunge Paste - click HERE to visit their blog

Crafty Individuals: The Animal World - click HERE to visit the blog

That's Crafty: Gold and Silver Challenge - click HERE to visit the blog

Thanks for looking!

Claire xx


Sunday 22 March 2015

When it all goes a bit wrong....

Hi everyone,

The lovely Darcy is hosting a calendar challenge over on her blog HERE

This month the challenge was:

1.Keep a part of the original picture and incorporate that into your design
2.Technique - use a candle or wax crayon as a resist
3.Add a title, using letters or words cut from a magazine/leaflet in a random style.
So for me this months page went very, very wrong lol! But as I only have the one calendar there wasn't much I could do about it so here it is finished anyway:

And this is how it started out:

So I started by rubbing a candle through a stencil all over the background which was a square type pattern, then I painted around the Buddha head using Fresco paints in Wisteria and Lavender.

Once dry I tried to rub away the wax and this is where is all went wrong....the wax wouldn't come off! So I rubbed some more and then the paint started coming off....you can kinda see some vague square shapes in the sky - if you look really closely ha ha!

Anyway I decided to just continue regardless.....

I added some lines with a card using Slate fresco as I thought it closely matched the colour of the Buddha. Then attempted to add some shading around the head with a charcoal pencil.....this then stared making the paint scratch off so I stopped that and just squiggled around it with a fude ball pen instead.

I didn't have a quote in mind when I started out but as it all went a bit wrong I decided this phrase was very appropriate!

I cut all the letters out and arranged them on the page:

When nothing goes right.....go left.

Seemed to fit well with how I was feeling ;-)

A few squiggles around each letter and I decided to leave it there before anything else went wrong!

Roll on April so I can turn this page over and start afresh!!

Claire xx


Saturday 21 March 2015

Mini Envelope Memory Book

Over on the Paperartsy blog this fortnight the challenge is deconstruction - this can be recycling, up cycling, or repurposing etc.

I have made a project using mini coin envelopes which I have repurposed into a mini memory book.

Here is my finished project:

I took some mini coin envelopes and measured them then cut covers to fit and also created the accordion spine using heavyweight smoothy card for both.

I used Chatsworth papers to decorate the front and back of my book and stamped the border, the keyhole and the postage stamp stamps from Paperartsy vintage ink and dog plate ID10 using Potting Soil archival ink.

This is the back:

I inked all the edges using the same archival ink.

I attached my ribbon across the insides of the covers and then added the spine (in hindsight I wish I had created the spine with dark card but hey ho!)

Inside the mini book are five little coin envelopes, I created some cards to fit inside some of the envelopes whilst others are empty:


The same border used on the covers is also stamped inside on each of the envelopes:

So I created this project with two special people in mind - my mum and sister and taking a trip to Ireland next week so this is for them to record any memories of places visited and also to collect all the ticket stumps and any other small mementoes that might encounter on their holiday.

And then the little book ties up nicely with a ribbon to keep everything safe and secure:

I really enjoyed making this as it's not the kind of the thing I would usually do and I think the Chatsworth papers are the perfect colour for an Irish themed memory book :)

Thanks for looking,

Claire xx


Wednesday 18 March 2015

Upcycled Jar

Hello,

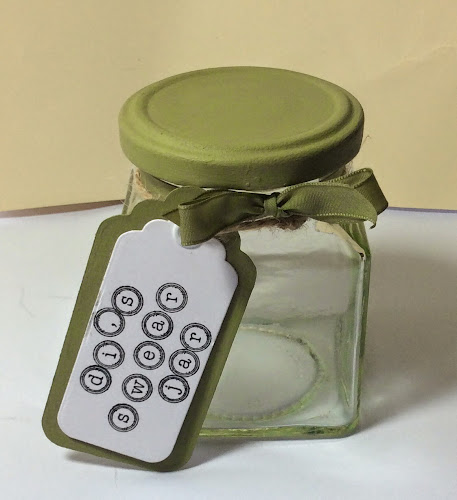
Here is a jar I upcycled into a decorated swear jar as a funny gift for my sister to give a work colleague:

It was a plain old jar with a black lid.

I sanded the lid as it had some writing on it and to give the paint something to hold on to as it was quite shiny.

Then mixed Guacamole and Green Olives paint until I matched my green ribbon.

I had to give the lid two coats of Snowflake and then three coats of the green mixture to cover all the black and the writing on the lid.


I diecut two tags from heavyweight smoothy card and painted the larger one with the leftover green paint mixture.

I added the tags using an eyelet and some old twine I found in my bits and bobs bag.

I tied the green ribbon around the neck of the jar then added the tags on the piece of twine after stamping with the sentiment requested by my sister.


It's quite difficult to take photos of a clear item!

I would like to enter my jar in the current Paperartsy challenge 'deconstruction' click HERE to find out more and see what creations the DT have come up with :)

Thanks for looking,

Claire x
 

Monday 16 March 2015

Brusho Meadow

Hello,

Today I'm sharing the Mother's Day card I made for my mother in law.

I wanted it to look like a scene so it's roughly blue at the top for the sky and green at the bottom with various colours inbetween.

I used watercolour card and sprinkled my brusho colours on before spritzing and drying.

I then stamped the grasses and large flower from Paperartsy Hot Picks plate 1009.

The butterflies are from one of the new Finnabair Prima plates - don't forget to fly and the sentiment is by Inkylicious, all my stamping was done using black versafine ink.

I used the brushos as watercolours to add extra colour to the petals on the large flower and also to the butterflies.

Added highlights with white pen and edged it with black promarker then mounted to a 7x7 card blank.

Thanks for looking,

Claire x


Sunday 15 March 2015

Flowers for Mum

Hi,

Today is Mother's Day here in the UK.

I made my mum this card using some of the new Lin Brown stamps by Paperartsy:

I cut three panels of card and stamped various images from plates ELB15 and ELB16 using black versafine ink, I then spent a lot of time colouring them in using my Spectrum Noir pencils - I love these but am still learning, really enjoying just playing around with them at the moment :)

So once all coloured I mounted them onto a 8x8 card blank and stamped the sentiment by Inkylicious using the same black ink.

I'm pleased to report that my Mum loved her card - although I'm pretty certain she's a bit biased!

I would like to enter my card in the current challenge over on The Artistic Stamper Creative Blog which is Spring is coming - you can find out more about this challenge HERE.

Thanks for visiting today,

Claire x


Sunday 8 March 2015

Upcycled miniature art

Hi everyone,

Today is the last day to join in with the current miniature art challenge over on the Paperartsy blog so this afternoon I decided to make another piece of miniature art to join in :)

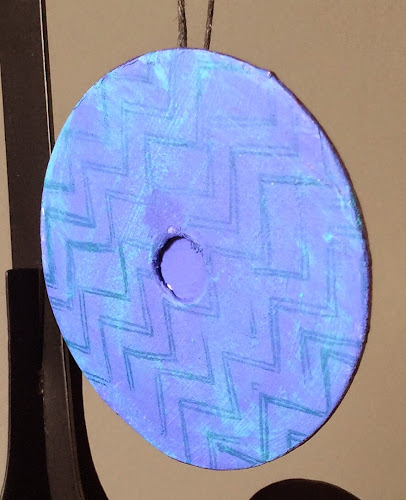
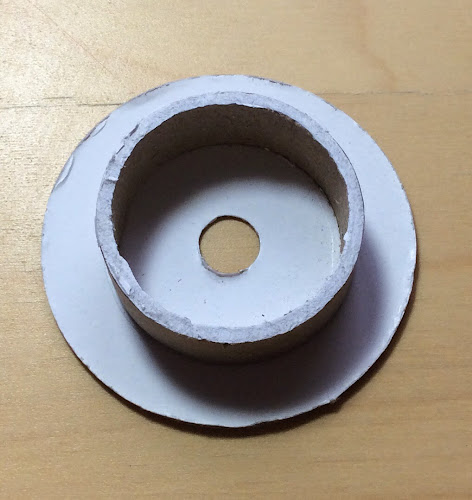
She started life as a empty reel of ribbon, she's only small - 6cm in diameter. This is how she looked when I started:

I took one of the large cardboard circles off:

Gave her a couple of coats of Snowflake and then went in with Carribean Sea and Lavender.

The centre is one of the girls from Clare Lloyds new sets (ECL04) stamped onto smoothy card using Cornflower Blue archival and coloured with Spectrum Noir pencils.

I also used the same inkpad to 2nd generation stamp the circles and cheverons onto the reel:

The hardest part was taking the photos today as the sun is streaming in my craft room window and it's so hot in here! I really struggled to take pics today - usually it's the lack of sunlight that causes me issues!

Anyway just to finish it off with a bit of shimmer I added some Royal Amethyst TG here and there, made a hole in the top and threaded some waxed black linen through to make a hanger.

She's now sitting pretty with my other miniature make on my unused jewellery tree:

Maybe one day my tree will be full of little tiny works of art.....

Hope everyone's having a lovely Sunday,

Claire x


Sunday 1 March 2015

Mini Birdhouse

Hello,

I'm here today to share a little birdhouse I decorated to join in with the current Paperartsy challenge which is miniature art - all the details and some fab inspiration can be found HERE

So here is my little birdhouse:

It started out as a plain wooden little birdhouse - it's roughly two inches high.

I gave it a good coat of Snowflake Fresco paint and then added Wisteria to the roof and crackle glaze to all the sides and base following up with Lavender.

Then once all the lovely cracks appeared I gave some parts of it a good sanding to reveal a bit more white paint and then also dry brushed it with Wisteria and Lavender.

Next I created all my little shrink plastic embellies using Lin Brown and JOFY stamps and Lin's limited edition colours.


I stamped the zig zags from Clare Lloyd's stamp set onto the roof using cornflower blue archival.

Then added all the flowers around the house and the little chicken to the front with cosmic shimmer glue.

So there he is now hanging on my little tree that's meant to be for hanging jewellery on :-)

Love Claire x